Pages

Saturday, April 25, 2015

Raising Readers

“What is the one thing that I can do to help my child be successful in school?”  Oh my, what a question.  When I am asked this question, I hear the plaintive call in the words and sympathize with parents who yearn to provide their children with the tools needed for later successes in school and life.  Parents want the best for their children.

While I believe parents can do several things to prepare their children for school and life, for today, I want to concentrate on the importance of building a love for and motivation for reading.

Children are taught explicitly how to read in the early grades, but in the upper elementary grades, the focus changes to using reading to learn other content.  And while it is obvious that students need to be good readers to excel in English Language Arts courses, having solid reading skills is also important in the other content areas such as science and social studies.

Reading skills are important to math success as well.  Most of us can remember having to do ‘word problems’ when we were in school.  Good readers have an easier time understanding what a word problem is asking them to do.  With the increased rigor of our current standards, reading competence will provide students with the necessary skills to understand the problems to be solved.

Being a good reader and being motivated to read will also help children (and adults) with their lives after school.  Over the years, I have become interested in a topic or needed to know how to do something, and because I am a good reader, I was able to find the information I needed.

So what can parents do to help promote reading?  Parenting is difficult, but promoting reading is one of the easier tasks a parent can tackle.  There are several things a parent can do, and you may already being doing some of these things.

The first thing to do is provide a home filled with all types of texts -  books, magazines, comic books.  Those of you who like a super neat house might cringe at this advice because these are the kinds of things that can create clutter.  I do not like the clutter either, but I think it is a good trade-off in order to always have something at hand to read.  And that is the point - children need to see that reading material is always available to them at home.

And you do not need a separate line item in the family budget for books because you can use your local library, or if you live in a rural place, you might be able to access a bookmobile.  When I was growing up, we did not have a local library, but the bookmobile came to our community twice a month.  Sometimes my mom would take us into Harmony, where the bookmobile would park in front of the dime store (remember those?).  Other times, she would take us over to Mayberry’s store to meet it.  It was always a treat for me, and I was able to check out as many books as I could carry.  My goal was to make sure that I did not run out of books before our next trip.  Mom would always spend time looking for books for her and my dad.  My brother and sister would usually check out books, too.
Reading aloud to your young children is another thing that you can do to encourage a love of reading.  This needs to be routine.  Children need to know that after dinner (or after being tucked into bed or whenever it fits in the daily schedule), mom or dad will be reading to them.  While you might not read to older children, it is still important for a reading time to be set aside, when everyone is reading something that interests them.

Children need to see their parents as readers, too.  Modelling is a tremendous method for parents to promote and encourage reading.  Both of my parents always had books they would read after dinner and before retiring for the evening.  I remember my dad reading the paper every day, and he and my mom, and grandpa would often discuss items they had read.  

And discussing what you and your children are reading is also a valuable tool.  As adults, we receive a lot of pleasure in talking about what we are reading with our friends and family.  I do this all the time (they may say I do it too often).  If your children are toddlers or pre-school age, talk with them about what you are reading together.  If your children are in school, then ask them about the texts they are reading in school, as well what they are reading on their own at home.

In addition, make sure that you talk to your children about YOU are reading.  An important skill that students need is the ability to make connections with what they are reading.  They need to do this automaticity, so modeling and practice are important.  Sometimes what we read reminds of us something else that we have read.  If so, talk about that.  Sometimes what you are reading reminds you of an experience from your own childhood.  Children love those stories, so share them.

To give you some more ideas about how to help your child become a good reader and enjoy different types of text, I created a Planting the Reading Seed flyer listing some ideas.  Feel free to share it.

Some of my books


I am curious about positive, warm childhood memories that you have about books or reading.  Share them with me in the comments section below.

Saturday, April 18, 2015

Just Creepin' Along

“Just need to let you know that you are riding with a crazy group of people,” Dan, the Blue Blaze shuttle driver, stated matter-of-factly to the three non-relatives on the van.  Yes, he was referring to my group - mom and dad, younger brother, sister-in-law, two nieces, husband and me.  


“Yeah?” prompted one of the other passengers.  


“Sure, these people will ride the Creeper in the snow, in thunderstorms, during tornado warnings,” added Dan.  My family laughed and agreed with him.  Dan was shuttling all of us up to Whitetop, where we would climb on our mountain bikes and ride the Virginia Creeper trail back down to Damascus.  


Years ago, I read in one of my magazines (have I mentioned that I have a slight addiction to magazines?) about the Virginia Creeper trail in Damascus, Virginia.  Later, some friends rode it and loved it, so I developed a hankering to try it myself.  But it did not happen until last year, when my husband and I, along with my mom and dad, decided to tackle it one early spring weekend.  


The Virginia Creeper is an 18 mile long, downhill biking trail.   Riders can bring their own bike or rent one from the many bike shops in Damascus.  Shuttle service is available to Whitetop, where riders unload and begin the fun ride back into Damascus.  Shuttle service is also available to a drop off point in Abingdon, and bikers can then ride a mostly flat trail back to Damascus.


Last spring, my husband and parents and I planned our trip, but delayed our arrival by a day because of a snowy forecast.  Three to four inches of snow fell the first night we were there, so we did not attempt a ride our first day.  On day two, we bundled up and headed to the top.  The descent was cold, especially with the wind hitting our faces, and soggy, but it was also invigorating and fun.  We stopped frequently to rest and snack and to enjoy the beauty of the ride. We saw few others on the trail.  It was late March, so the tourist season had not yet begun.  Did I mention that it was cold?


We enjoyed the trip last year so much that we planned another one for this year over the second week in April.  To last year’s group, we added my younger brother, his wife, and their two daughters.  We rented a beautiful cabin in a terrific location.  The cabin was situated on rolling hills on a farm just a short ways from Damascus.  


Although rain, thunderstorms, and tornados were forecast for our first day of riding, we persevered, riding the Abingdon to Damascus trail.  Despite the dire forecast, we made the entire ride with most of us avoiding any rain.  Near the end we straggled out a bit, so the last two making it in found themselves in a brief rain shower.  


We hooked up with Blue Blaze Bike Rental and Shuttle Service to provide us with shuttle service and a couple of bikes.  We had used Blue Blaze last year, and we liked Rick, the owner, and Dan, the shuttle driver.  They did not disappoint this year.  Rick had added a member to the staff, Zoey, a 6 month old Australian shepherd.  We met her when she bolted out the door.  She evaded seven of us before my husband scooped her up and returned her to Rick.


Dan shuttled us to Abingdon, joking with us about our collective craziness for persevering despite the forecast.  I laughed when I saw an ambulance and police officer parked at the drop-off zone.  Inwardly, I wondered if their presence might foreshadow a less than promising finish to the day.  


Finally, we were off.  The Abingdon to Damascus portion of the Virginia Creeper follows along the Holston River.  This portion of the trail is primarily flat, so it did require a lot of pedalling.  We stopped frequently for water breaks.  It is important to keep hydrated, and it is a great way to sneak in a few minutes of rest, which was important to me, since I have not biked much in several years.  


Because of recent rains, the river was up.  Most of the trail wandered next to the river, sometimes through private land.  Strategically placed gates helped farmers to move and protect their cattle, while still allowing riders to continue along the trail.  Sometimes the trail meandered between tall rock facings.


Because no one else was on the trail with us, and because we stopped frequently, we saw quite a bit of wildlife.  Most of us saw wild turkeys near the beginning of the ride.  Chipmunks were everywhere, and a fox squirrel was also spotted.  We marveled at five deer who had ventured to the river for a drink.  One of my nieces spied a large black snake in a tree, just off the path, and a second snake a little lower in another tree.  My husband also spotted a young eagle.  


The next day was Saturday, and we shuttled to Whitetop to complete the 18 miles back down to Damascus.  Although the temperature was nippy at the top, the drop-off lot was packed.  This ride would not be like the day before or even the ride the previous year.  What appeared to be an entire platoon of Boy Scouts took off before us, but not without some initial communication problems, causing a bike jam at the starting point.


We followed the same modus operandi as the previous day, stopping for water breaks and to check on each other.  The Virginia Creeper trail from Whitetop follows Laurel Creek down, and we found a spot with a couple of large, flat rocks in the sun, to use as our picnic spot.  


We all enjoyed the ride from Whitetop much more than the trip from Abingdon.  We did not encounter any wildlife, but we did not really expect to see any because of the number of people on the trail.  When we were here last year, Dan, the shuttle driver, told us about the fish that could be found at trestle 33.  We enjoyed watching them last year and again this year.


We caught one member of our group texting and riding, although she claims she was taking a picture, which of course is perfectly fine.  Unfortunately, the youngest member of our group tried to drink (water) and ride, and she wrecked.  She was not injured, and we all hope she learned her lesson.  


I like nothing better than being active, outdoors, with family, so this was a perfect getaway for me.  No one in the family bikes regularly, but we all made it through both sections of the trail.  The youngest member of our peloton was ten years old and our eldest was 72 years old.  Granted, I think we all had a nap after the Abingdon ride, but we were happy to be riding again the next day.  


Be forewarned, though, if you are not biker, you may experience some saddle soreness after the first day.  Learning from this from our first trip, I put a better (read:  more cushiony) seat on my bike, and I invested in some riding capris with padding in strategic places.  Both of these items I obtained from Bryson City Bicycles, where Diane helped me find what I needed.  


We are looking forward to another trip in a year.  The third time's a charm, so I am hoping for sunny skies next time!
Dan was kind enough to take a photo of this crazy group of riders before we headed down the trail.


Saturday, April 11, 2015

Getting ready for the lake or Why I Needed Six Bandaids

I had several ideas for puttering around the house this week, having taken some time off during spring break.  I fully intended to ready all my flower beds, sew a few seeds, and pull some weeds. Unfortunately, this has proved impossible as the weather has not cooperated.  So I worked on a different project altogether.

My husband and I own an older pontoon boat that we enjoy using on Fontana Lake each summer. When we bought the boat a few years ago, we added new seats.  Last spring, as we were readying it for the summer, we noticed that the threads holding the vinyl panels together on the seats had disintegrated on a couple of the seats that received the most sun.  The thread holes were still visible, so I thought it would be easy to re-sew them.  We intended to repair these right away, but one thing led to another, and suddenly it was October, and we were pulling the boat out of the water!  My husband took the two bench seats and two small seat backs off, so that we could work on them over the winter.

So now it is April, and it is to put the boat back on the water.  After looking at the cushions, I realized that the thread holes had disappeared, so we were stuck with either buying new seats, re-covering the existing seats, or just dealing with split seats.  I decided to try my hand at re-covering them. No, I have not had training in re-upolstering.   No, I have never done a project like this before. So I did a bit of online research, and I felt confident (HA) about the project.  I am a firm believer that I can learn how to do just about anything with a little reading/research and some practice.

NOTE:  Some of the articles I found online included directions on how to sew new covers, and although my original seats had these types of covers, I did not want to go that route with this project. I am unsure if my sewing abilities are equal to the task.  I planned to cover the entire seat with one panel - plain, but functional.  Thus the re-covered seats will look much different from the way they looked originally.

First, I had to purchase vinyl.  I ordered enough to cover ALL the seats since I believe that, eventually, the thread in the remaining seats will disintegrate.  I chose to go with a snow white color because the existing seats are white with blue contrast.  The blue vinyl becomes extremely hot when the sun hits it.  I have burned myself more than a few times when I forgot to put a towel down.  I definitely did not want a dark color.

After searching online for companies that carried marine vinyl and checking prices and colors, I placed an order with Old Trail Fabric Outlet.  I ordered the vinyl on a Monday and chose standard shipping.  The package was delivered to my house on Wednesday!  The entire process was simple and easy.  Old Trail sent me email updates at each step of the fulfillment and shipping process.

So I began.  Photo 1 below shows what the seats looked like before I started.  Yuck!  Who wants to sit on this?  Not me.

Photo 1

I gathered my tools - a staple gun, staples, scissors, Leatherman tool, pliers, tape measure, pencil.   I should mention that I had my first wound before ever starting.  In examining the various implements in my Leatherman tool, I pinched a joint of a finger on the palm side of my hand.  It took a hunk of meat out of the finger, and I thought I would never get it to stop bleeding.  Later, during the project, I scraped the knuckle of an adjacent finger, and it bled as well.  All told, I used six bandaids and several gauze squares on the first day of this project!

The original seats had staples every one-half to one inch.  I pulled them all out to remove the old vinyl. Removing the staples from four cushions took a few hours.   Some people might have ripped or cut the vinyl off and left the staples in, but I thought that the old staples might be problematic when I tried to staple over them.  And I wanted to start with a clean edge.  

In photo 2, below, you can see that I am prying the staples up enough (photo 3), so that I can use pliers (photo 4) to pull them completely out.  Be sure and note how the corners are worked on the original.  Because the new cover is all one piece, rather than pieces that are sewn together, the new corners will look differently.
Photo 2

 Photo 3

Photo 4

After I removed the cover and the torn plastic from the first cushion, I realized that the cushion was wet in a couple of places.  The seat had been in the dry since October. I could not believe that the cover had held moisture this long!  I removed the other three covers and found the same situation on two of them.  I  laid them aside to dry overnight.

The final thing I did for the day was to measure the first seat.  The next day, after checking to see if the foam was completely dry, I measured again (photo 5) to double-check my numbers.  I measured both length and width, by moving up the side, across the top, and down the other side, adding a couple of inches to wrap underneath for stapling.
Photo 5

After spreading the vinyl on the table,  I marked and cut it (photo 6).  I used a pencil to mark it, and most of the pencil lead disappeared in the cut.


Photo 6

Then someone volunteered to help (photo 7).  Zoey, who had slept through all the staple pulling the day before, decided she needed to be involved.  I was afraid she would rip the foam when I picked her up, since she does nearly everything claws out, but she decided to cooperate.  Once she was up, I centered the foam and backing on the vinyl.
Photo 7

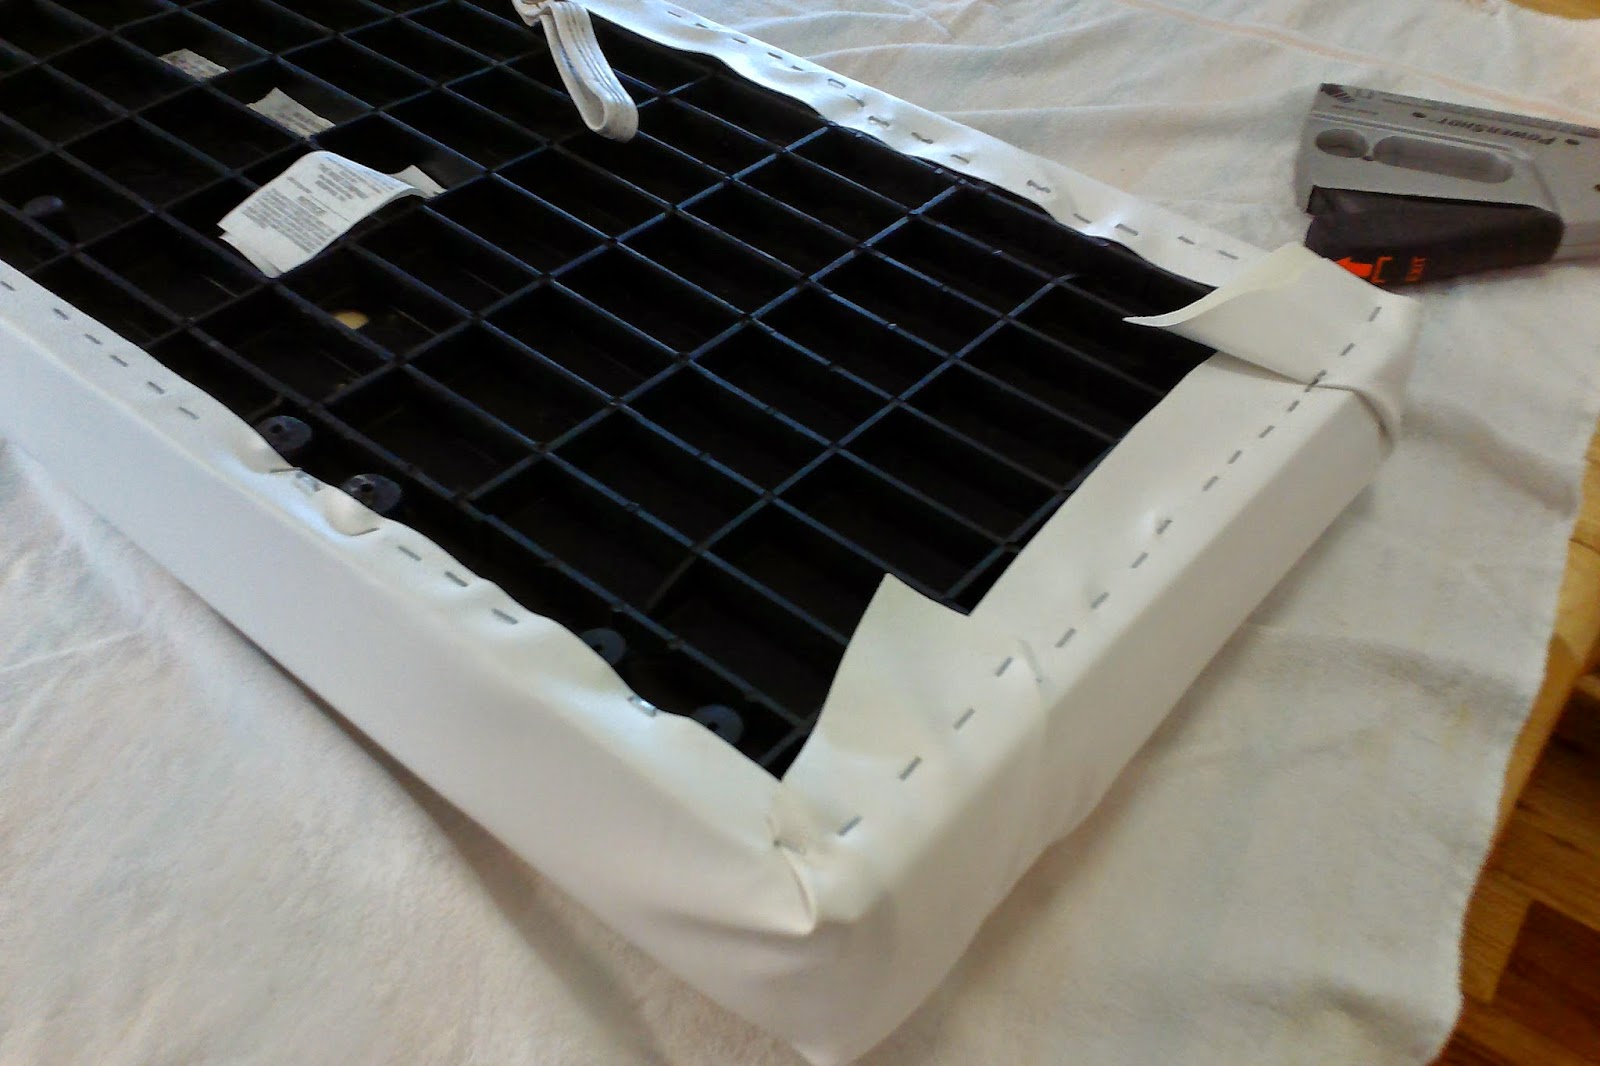
Finally, I was ready to staple.  I stapled one long side (photo 8), then moved to the opposite side.  At this point it would have been helpful to have someone assist me, because three hands are better than two.  It is important to pull the vinyl (hand 1) as tightly as possible, hold it in place (hand 2), and then staple it (hand 3).  While I believe I did a fairly decent job of pulling it taut, I am concerned that once the sun hits the vinyl that it might relax and be too loose.  I had hoped to complete this project outside, letting the sun warm the vinyl to make it more pliable, but instead of sun, we had rain this week, so I worked at the kitchen table instead.  
Photo 8

Notice in photo 8 the round knobs that I stapled around.  All the stapling was smooth, except for these areas.  Fortunately, there were only two on each long side.

I repeated this process for the two short sides, finishing the corners as I went (photos 9 and 10).  On the larger seat, one corner was rounded, which proved a bit difficult.  I am sure there is a prettier way to finish a corner (photo 9).  
Photo 9


Photo 10

After the first seat, I covered the two smaller seats (the other larger cushion was still damp on one corner).  These two went a bit more quickly than the first, and the corners were easier to negotiate as well (photos 11 and 12).
 Photo 11
'
Photo 12

Overall, I am happy with the results (photo 13).  I am anxious to put the boat on the lake and see how they work out.

Photo 13

At some point, I will re-cover the rest of the cushions.  The seat backs will also need to be re-covered, too, but I am uncertain as to how to proceed with them.  I fear we might have to removed the entire seat/bench in order to access them.  Any thoughts on this?

For those of you with boats, what do you use to clean your boat seats?  What is the best product for removing mildew stains?

I joked to a friend that a better name for this post might be 'how not to re-cover your boat seats.'  Let me know what you think of my first 'puttering' tutorial in the Comments section below.  If you have tried a similar project, let me know how it worked out for you.

Let me leave you with one final shot (photo 14) of Zoey, who was so helpful.
Photo 14

Saturday, April 4, 2015

Mining the Gold

A couple of months ago I accidentally read a book of short stories by Ron Rash, entitled Nothing Gold Can Stay.  It was an accident because I do not routinely read short stories.  I have nothing against them, except, well, they are short.  I like to live with a story for awhile, savor it for as long as possible, even while I read furiously to the end.

That said, I loved Nothing Gold Can Stay.  It was not my first encounter with Rash's work, having read some of his novels previously.  One of the reasons that I enjoy his work is because of all the connections that I can make with it.  English Language Arts teachers know how important making connections to new text and new content is.  It is a great way to activate prior knowledge and prepare oneself for reading.  Not to mention that finding something familiar in a new story just makes it more fun.

The connection in the Gold stories is one of place.  The stories are set in Western North Carolina around Sylva, Canton, Cherokee, and the Great Smoky Mountains National Park.  While there are many extraordinary characters in the collection, the setting feels like a character.  Though none of the stories share characters, they do share the familiar places, and so feel loosely connected.

Shortly after reading the stories, I was facilitating an online professional development course/ book study for some of the educators in my school district.  One of the texts that we were reading was Momaday's Man Made of Words essay.  In the essay, Momaday shares a Kiowa myth that underscores the importance of language.  One of the characters in the myth did not realize his danger because he was unfamiliar with the language of the other characters.  The discussion that resulted from this point of the essay reminded me of one of Rash's stories in Gold.

In "A Servant of History," a young, immature, and blathering man named Wilson thought he would surpass his teachers from Oxford by collecting stories and knowledge from Appalachian settlers that would provide a connection to the language and stories from England.  Being a pushy, know-it-all outsider proved to be a hinderance to gathering the information he sought, but his runaway mouth revealed more about him to the settlers than he realized.  Too late he realized that if he had paid more attention to history, specifically the animosity between clans McDonald and  Campbell, he might have recognized the danger his visit posed.

Another story that resonated was "Those Who Are Dead Are Only Now Forgiven."  It disturbed me because as an educator, I have seen too many students find themselves in similar situations.  In this story, a bright, young couple had plans to attend college in the fall.  Only Jody makes it to the university, while Lauren remains at home and, like so many of their high school classmates, loses herself to drug use.  Jody returns after a year and attempts to persuade Lauren to return with him, but she has long abandoned any hope of having a better life.  Rash mentions how so many young people believe that the hard, poor, and hopeless life is inevitable.  This inevitably often leads students to sabotage themselves through various means as Lauren does.  The most heartbreaking part of the story, though, is the decision that Jody makes at the end.

The book contains several other stories, all of which quickly draw the reader in.  These stories were just the right length to read before sleeping each night.  And like the novels that I prefer, they gave plenty to ponder for days.  I hope you pick up a copy soon.

Some helpful references:
Momaday, N. S.  "Made Made of Words" excerpt.
This is the essay used in the online course that I facilitated.  It contains the story of the Arrowmaker, which provided the immediate connection, but it also speaks about the nature of storytelling and the Kiowa migration.  Momaday speaks of how any burden can be borne if there is a story about it.


Frost, R.  Nothing Gold Can Stay.
This is the poem from which Rash took the name for his work.

"'Nothing Gold' Stays Long in Appalachia." Scott Simon, NPR, interviews Ron Rash.  16 February 2013.

Maslin, J. (27 February 2012).  "Be Careful of the Locals:  They're Tough."  The New York Times book review.