My husband and I own an older pontoon boat that we enjoy using on Fontana Lake each summer. When we bought the boat a few years ago, we added new seats. Last spring, as we were readying it for the summer, we noticed that the threads holding the vinyl panels together on the seats had disintegrated on a couple of the seats that received the most sun. The thread holes were still visible, so I thought it would be easy to re-sew them. We intended to repair these right away, but one thing led to another, and suddenly it was October, and we were pulling the boat out of the water! My husband took the two bench seats and two small seat backs off, so that we could work on them over the winter.
So now it is April, and it is to put the boat back on the water. After looking at the cushions, I realized that the thread holes had disappeared, so we were stuck with either buying new seats, re-covering the existing seats, or just dealing with split seats. I decided to try my hand at re-covering them. No, I have not had training in re-upolstering. No, I have never done a project like this before. So I did a bit of online research, and I felt confident (HA) about the project. I am a firm believer that I can learn how to do just about anything with a little reading/research and some practice.
NOTE: Some of the articles I found online included directions on how to sew new covers, and although my original seats had these types of covers, I did not want to go that route with this project. I am unsure if my sewing abilities are equal to the task. I planned to cover the entire seat with one panel - plain, but functional. Thus the re-covered seats will look much different from the way they looked originally.
First, I had to purchase vinyl. I ordered enough to cover ALL the seats since I believe that, eventually, the thread in the remaining seats will disintegrate. I chose to go with a snow white color because the existing seats are white with blue contrast. The blue vinyl becomes extremely hot when the sun hits it. I have burned myself more than a few times when I forgot to put a towel down. I definitely did not want a dark color.
After searching online for companies that carried marine vinyl and checking prices and colors, I placed an order with Old Trail Fabric Outlet. I ordered the vinyl on a Monday and chose standard shipping. The package was delivered to my house on Wednesday! The entire process was simple and easy. Old Trail sent me email updates at each step of the fulfillment and shipping process.
So I began. Photo 1 below shows what the seats looked like before I started. Yuck! Who wants to sit on this? Not me.

Photo 1
I gathered my tools - a staple gun, staples, scissors, Leatherman tool, pliers, tape measure, pencil. I should mention that I had my first wound before ever starting. In examining the various implements in my Leatherman tool, I pinched a joint of a finger on the palm side of my hand. It took a hunk of meat out of the finger, and I thought I would never get it to stop bleeding. Later, during the project, I scraped the knuckle of an adjacent finger, and it bled as well. All told, I used six bandaids and several gauze squares on the first day of this project!
The original seats had staples every one-half to one inch. I pulled them all out to remove the old vinyl. Removing the staples from four cushions took a few hours. Some people might have ripped or cut the vinyl off and left the staples in, but I thought that the old staples might be problematic when I tried to staple over them. And I wanted to start with a clean edge.
In photo 2, below, you can see that I am prying the staples up enough (photo 3), so that I can use pliers (photo 4) to pull them completely out. Be sure and note how the corners are worked on the original. Because the new cover is all one piece, rather than pieces that are sewn together, the new corners will look differently.

Photo 2

Photo 3

Photo 4
The final thing I did for the day was to measure the first seat. The next day, after checking to see if the foam was completely dry, I measured again (photo 5) to double-check my numbers. I measured both length and width, by moving up the side, across the top, and down the other side, adding a couple of inches to wrap underneath for stapling.

Photo 5
After spreading the vinyl on the table, I marked and cut it (photo 6). I used a pencil to mark it, and most of the pencil lead disappeared in the cut.

Photo 6
Then someone volunteered to help (photo 7). Zoey, who had slept through all the staple pulling the day before, decided she needed to be involved. I was afraid she would rip the foam when I picked her up, since she does nearly everything claws out, but she decided to cooperate. Once she was up, I centered the foam and backing on the vinyl.

Photo 7
Finally, I was ready to staple. I stapled one long side (photo 8), then moved to the opposite side. At this point it would have been helpful to have someone assist me, because three hands are better than two. It is important to pull the vinyl (hand 1) as tightly as possible, hold it in place (hand 2), and then staple it (hand 3). While I believe I did a fairly decent job of pulling it taut, I am concerned that once the sun hits the vinyl that it might relax and be too loose. I had hoped to complete this project outside, letting the sun warm the vinyl to make it more pliable, but instead of sun, we had rain this week, so I worked at the kitchen table instead.

Photo 8
Notice in photo 8 the round knobs that I stapled around. All the stapling was smooth, except for these areas. Fortunately, there were only two on each long side.
I repeated this process for the two short sides, finishing the corners as I went (photos 9 and 10). On the larger seat, one corner was rounded, which proved a bit difficult. I am sure there is a prettier way to finish a corner (photo 9).

Photo 9
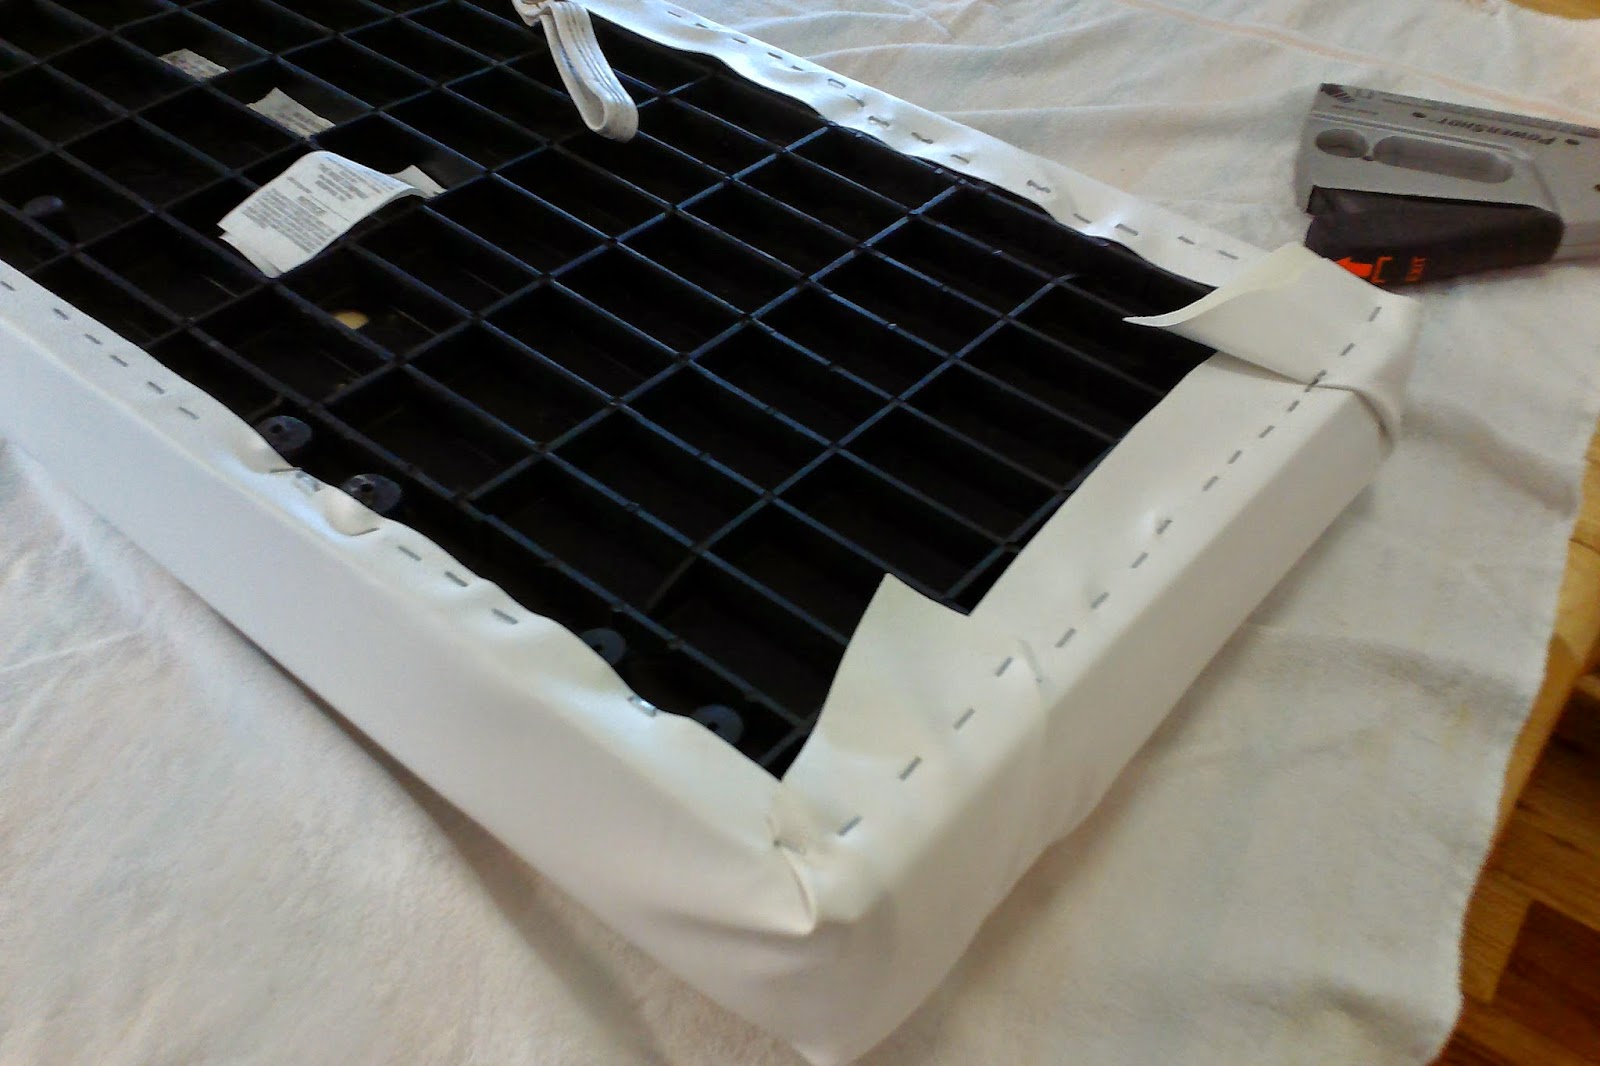
Photo 10
After the first seat, I covered the two smaller seats (the other larger cushion was still damp on one corner). These two went a bit more quickly than the first, and the corners were easier to negotiate as well (photos 11 and 12).

Photo 11
'

Photo 12
Overall, I am happy with the results (photo 13). I am anxious to put the boat on the lake and see how they work out.
.JPG)
Photo 13
At some point, I will re-cover the rest of the cushions. The seat backs will also need to be re-covered, too, but I am uncertain as to how to proceed with them. I fear we might have to removed the entire seat/bench in order to access them. Any thoughts on this?
For those of you with boats, what do you use to clean your boat seats? What is the best product for removing mildew stains?
I joked to a friend that a better name for this post might be 'how not to re-cover your boat seats.' Let me know what you think of my first 'puttering' tutorial in the Comments section below. If you have tried a similar project, let me know how it worked out for you.
Let me leave you with one final shot (photo 14) of Zoey, who was so helpful.

Photo 14
No comments:
Post a Comment